


Ubuntu LOVES Flutter devs
Step by step installation of Flutter on an Ubuntu machine


My ThinkPad X240 (2013) is old and laggy, but I love it. Ubuntu gave it a second life and apparently, Ubuntu LOVES Flutter because the installing part is sooo much easier than on Windows or Mac. This is an article for people that want to get started quickly and for me to just have a reminder online on how to do it.
Open a terminal (Ctrl + Alt + T):
$ sudo apt update
$ sudo apt upgrade
$ sudo snap refresh
That should bring your laptop up to date. Stay in the terminal and
Install the Flutter SDK
$ sudo snap install flutter --classic
$ flutter sdk-path
Install additional Linux requirements
$ sudo apt install clang cmake ninja-build pkg-config libgtk-3-dev liblzma-dev
Set up hardware acceleration for the emulator
Don't know what this means? See Android Studio's explanation on why and how HERE.
$ sudo apt install cpu-checker
$ egrep -c '(vmx|svm)' /proc/cpuinfo
$ kvm-ok
$ sudo apt install qemu-kvm libvirt-daemon-system libvirt-clients bridge-utils
Install Android Studio
I use a snap package for Android Studio, which is at the moment, the Dolphin* version which suits me just fine. The most important reason for me to use snap is that it's 100% plug & play and you don't need to worry about paths, registries, gradles or whatever.
*On May 21, 2023, the Android Studio snap was updated to Flamingo!
$ sudo snap install android-studio --classic
Let's dive in further.
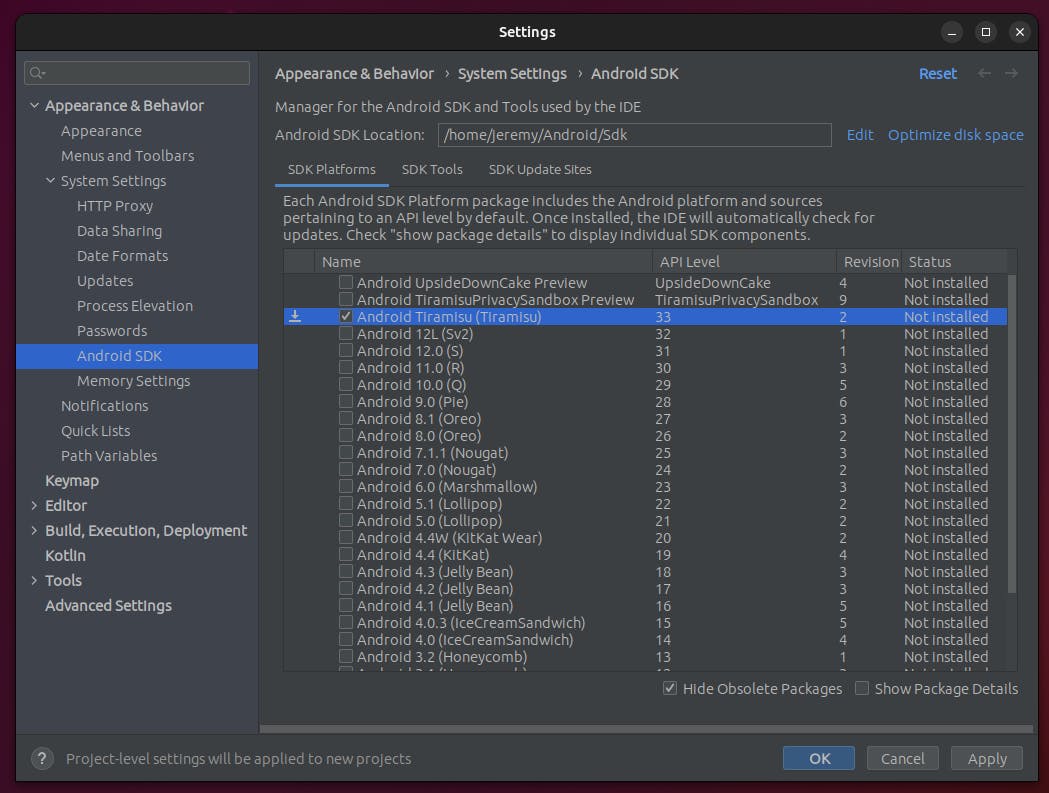
Start Android Studio from your app drawer and follow the installer (do not import settings and just go with standard installation). Install the latest stable SDK Platform:
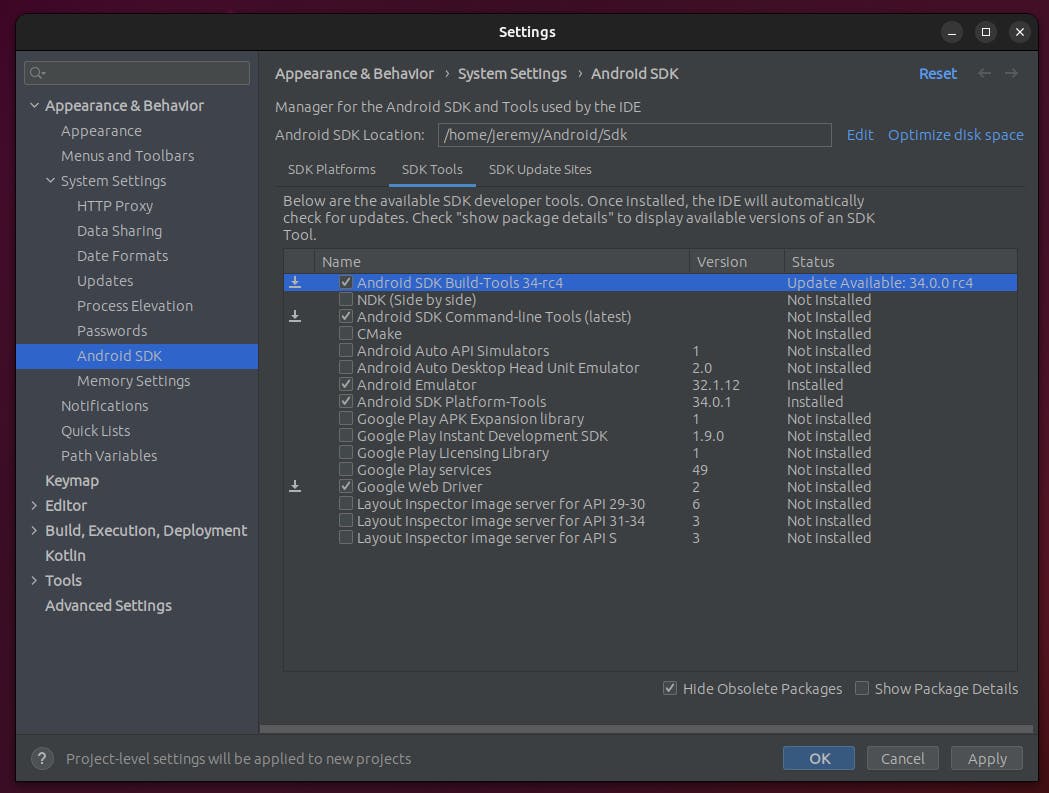
Install the SDK Tools, just select the ones you see selected here:
Click Apply and then OK.
Plug-in time!
Click plug-ins and install one by one:
Flutter
Rainbow Brackets
Codeglance Pro
Atom Material Icons
Material Theme
Github Copilot (optional)
Restart your IDE and follow the Material Theme wizard -> then CLOSE Android Studio
Finish up
Open a terminal and enter:
$ flutter doctor -v
$ flutter doctor --android-licenses
Done!
Now WAIT. If you're familiar with Flutter & Android Studio, you're done now. But if you want to finish and tweak your setup like I do, follow along! Next up is when you've already used GitHub and/or Flutter and/or Firebase before.
Set up GitHub
Open a web browser and sign in to GitHub
Click your avatar and choose Settings
Go to Developer Settings -> Personal Access Tokens
Choose Tokens (classic) -> Generate new token (classic)
Enter a note that means something to you (Android Studio Token)
Expiration -> No expiration
Leave NOTHING unchecked (because why not)
Click on 'Generate Token' and copy it -> STORE THIS SOMEWHERE SAFE
Now we let Android Studio know we are real developers with an actual GitHub account.
Open Android Studio
Click on 'More Actions' -> Get from Version Control
Select 'Github' -> Use token -> Paste token and 'Log in'
Clone your Flutter repository
Trust the project and wait a sec until Android Studio finished loading up
Set up your IDE
Click on 'Event log' and do what it says one by one
Click your avatar (upper right icon) and sign in to Google
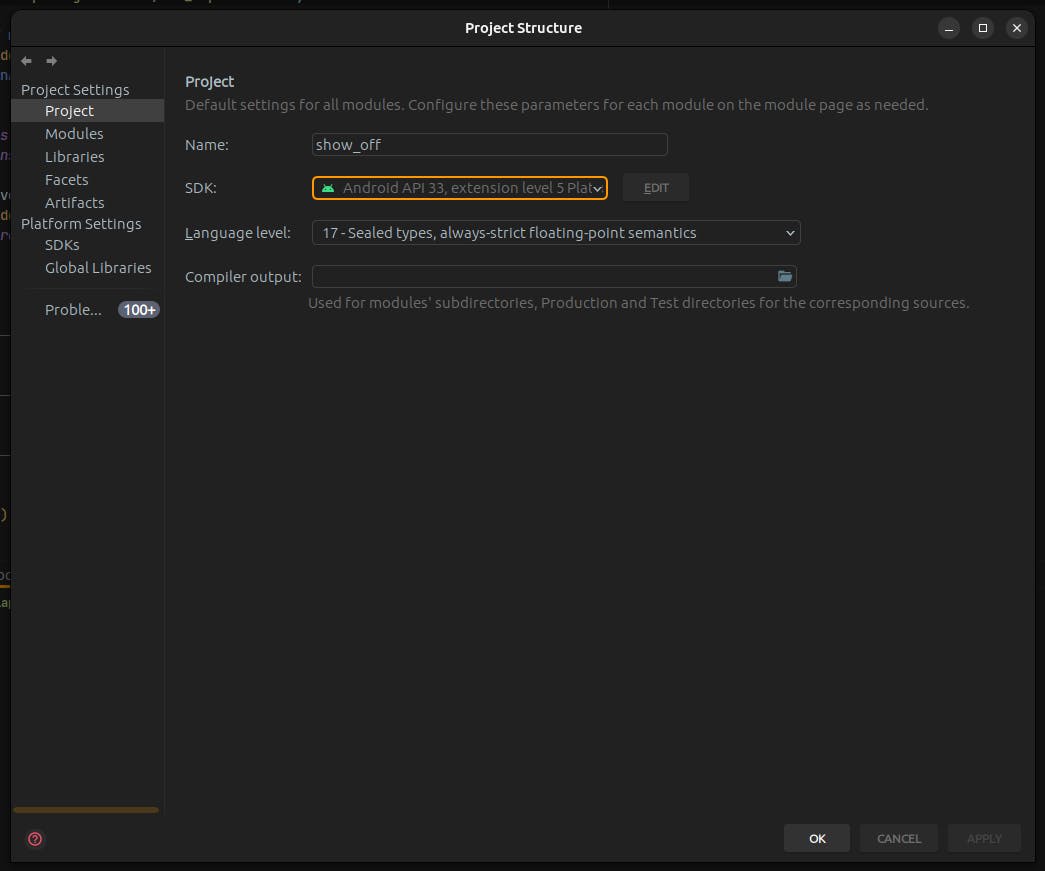
Click the three dots left of your avatar and choose Project Structure
Set the SDK to the version you downloaded before (it's there in the dropdown)
Hit Apply/OK
Last settings
Click File -> Settings -> Languages & Frameworks -> Flutter
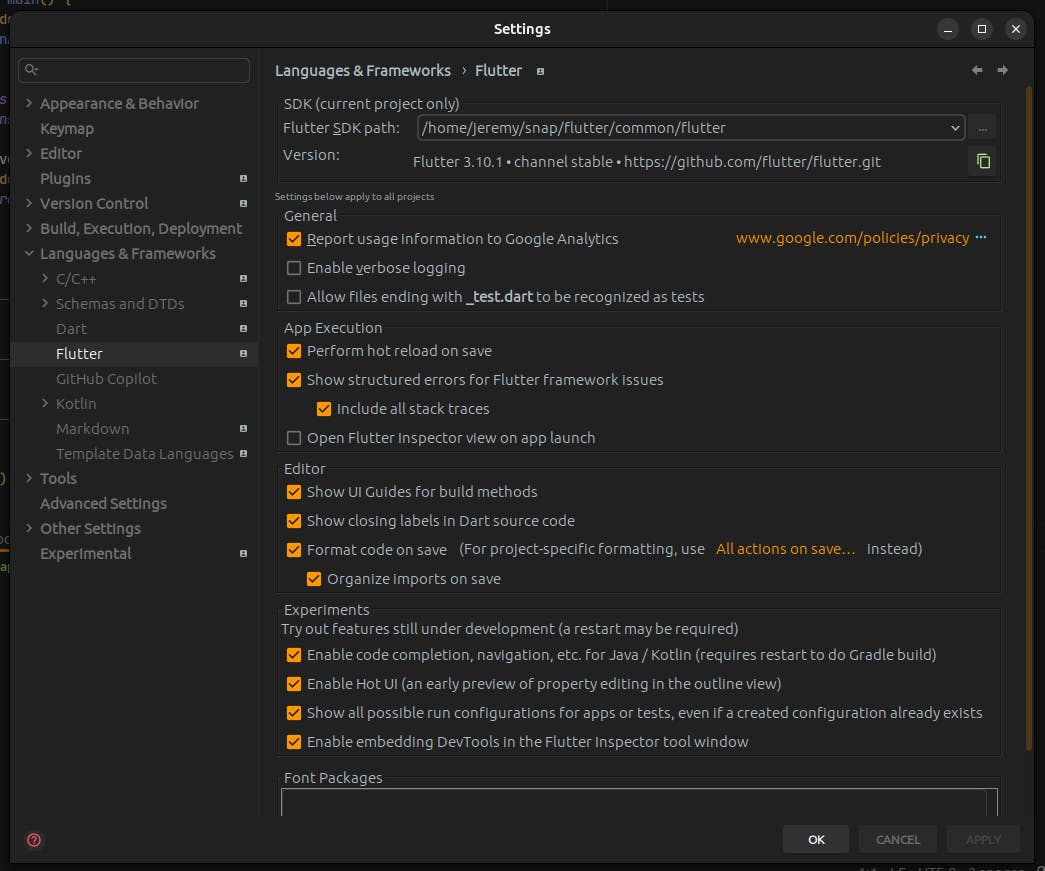
Your Flutter SDK path should be something like /your/path/to/snap/flutter/common/flutter
Check the boxes that I checked for more Quality of Life
Hit Apply/OK
Download the best Android Studio settings in the world
This is my .zip file that has my personal settings for Android Studio. You can use it as well and download it from HERE. Do not unpack it, just leave it as a .zip file.
- Click File -> Manage IDE Settings -> Import settings -> AndroidStudioSettings.zip
'TESTING - TESTING - 123'. Open a terminal INSIDE Android Studio
$ flutter pub get
If this works, it means Flutter is set up globally and you can use and do everything you want from inside Android Studio.
Install FlutterFire a.k.a. Firebase CLI
I use Firebase for diagnostics, authenticating users and hosting my Flutter web apps. It's free and easy to use and I wouldn't know one reason to use something else for my little hobby projects. To use this as well, do this:
$ sudo apt install nodejs
$ sudo apt install npm
$ sudo npm install -g firebase-tools
$ firebase login
If you find FlutterFire interesting, I have another blog for you right HERE.
Now go and make something beautiful. Thanks for reading.